Creating and Formatting an Embedded Browse
Description
Procedures for creating an embedded browse and then formatting it.
Procedure: Creating the Embedded Browse
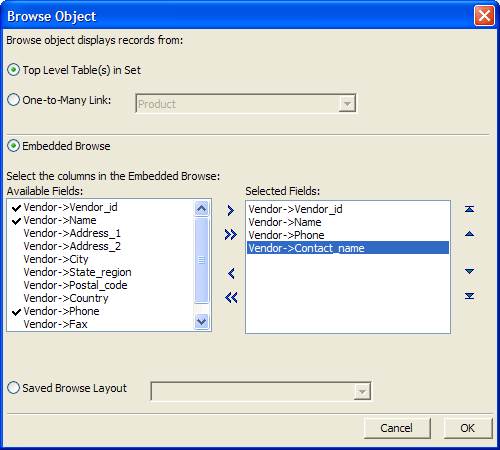
The following procedure assumes that the developer has opened the form in the Form Editor. Follow these instructions to create an embedded browse similar to Object1.
Sketch the embedded browse on the form.
Select the "Vendor->Vendor_id" field and click '>'.
Repeat for the "Vendor->Name", "Vendor->Phone", and "Vendor->Contact_name" fields.
Click OK.
Procedure: Formatting the Embedded Browse
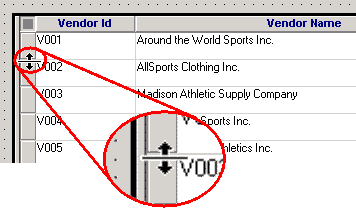
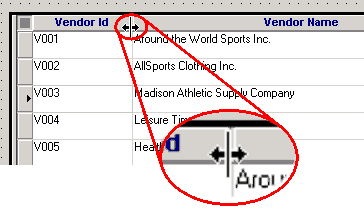
The following procedure assumes that the developer has opened the form in the Form Editor . Follow these instructions to format an embedded browse similar to Object1 .
Double click the browse so that the dark outline appears.
Position the cursor over the row separator until the special cursor appears, then drag the line until the row is the correct height.
Position the cursor over the column separator until the special cursor appears, then drag the line until the column is the correct width.
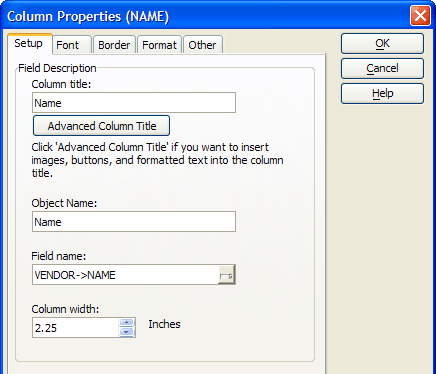
Click a cell in the Vendor_name column, right click and select Properties....
Change the Column title field to "Name".
Repeat for the other columns to give them appropriate names.
Click OK.
See Also